Posts

Showing posts from November, 2019

Android Studio: Adding two numbers (Java Code)
Image
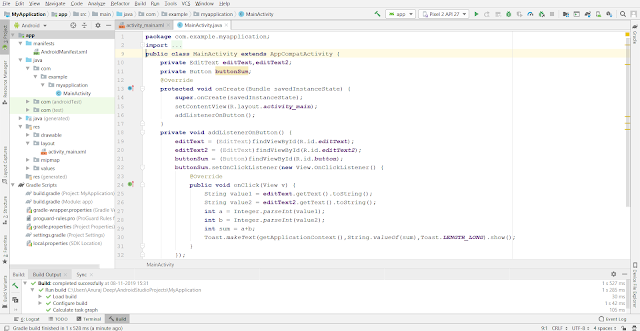
ANDROID APP FOR ADDING TWO NUMBERS (JAVA CODE) In this blog we are going to learn about the Android App, for adding two number. "AndroidManifest.xml" <?xml version="1.0" encoding="utf-8"?> <manifest xmlns:android="http://schemas.android.com/apk/res/android" package="com.example.myapplication"> <application android:allowBackup="true" android:icon="@mipmap/ic_launcher" android:label="@string/app_name" android:roundIcon="@mipmap/ic_launcher_round" android:supportsRtl="true" android:theme="@style/AppTheme"> <activity android:name=".MainActivity"> <intent-filter> <action android:name="android.intent.action.MAIN" /> <category android:name="android.intent.category.LAUNCHER" /> </...
Android Studio: Basics of Android Studio

Image
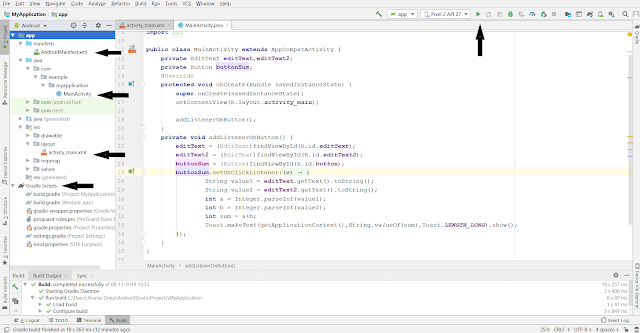
-------INTERNAL DETAILS OF ANDROID PROJECTS-------- Firstly we are going to learn about the "AndroidManifest.xml" file. Regardless of any project you create it must contain manifest file in it. Android Manifest is one of the most important file for the working of android project. You should must configure the manifest file correctly to get desired output, otherwise it throws lots of errors. It may leads to fail locating further activity. In manifest you can also order the activities, and also set the first activity which will launched as app launched. <?xml version="1.0" encoding="utf-8"?> <manifest xmlns:android="http://schemas.android.com/apk/res/android" package="com.jessicathornsby.myapplication"> <application android:allowBackup="true" android:icon="@mipmap/ic_launcher" android:label="@string/app_name" android:roundIcon=...

Android Studio: Creating Android Studio Project

Image
Now, In this blog we are going to learn How To Create Android Studio Project. Creating Android Studio Project         Step 1: Double click on Android Studio and then select "Start a new Android Studio Project"....    Step 2: Now here you have to select between various activities according to the requirements of your project but I still prefers to choose "Blank Activity". By choosing "Empty Activity" you can easily modify your project easily. Then click on "Next".. Step 3: Here, on this page you set name of your project, location to save your project then language, in language you can select between "JAVA and Kotlin" then you have to select "Minimum API level".... Step 4: "Project Created"